The Potato Side Dish That Made Me Rethink Everything I Thought I Knew About Potatoes
There are potato sides that require peeling and boiling and mashing, and then there’s this Oven-Baked 4-Ingredient Cheesy Potato Stacks—the one where you slice potatoes thin, layer them in a muffin tin with butter and cheese, bake until golden and crispy on the edges, and pop out individual towers of impossibly tender, cheese-laced perfection that look like you attended culinary school. No boiling water. No mashing. No complicated technique. Just thin potato slices, melted butter, salt, and cheese creating something so beautiful and delicious that people will ask how you made them, and you’ll feel slightly guilty saying “four ingredients.”
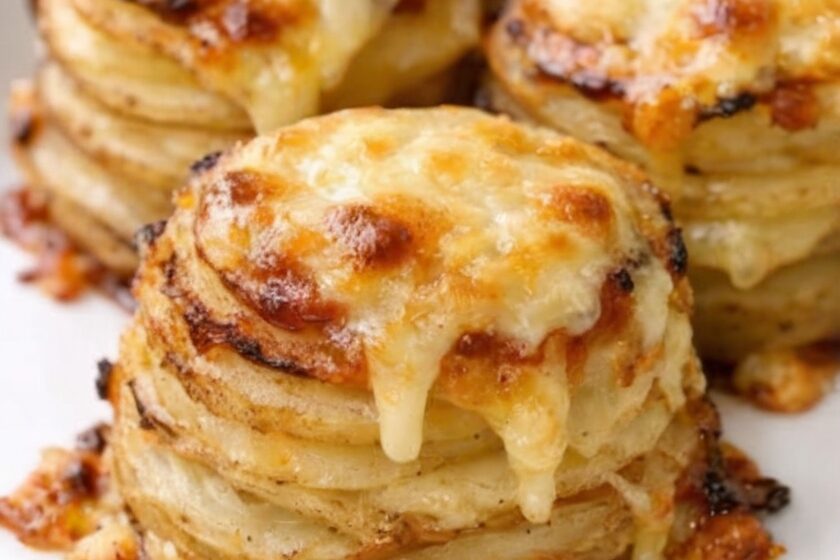
What makes this recipe genuinely brilliant is how the muffin tin creates individual portions with maximum surface area for those crispy, golden edges everyone fights over. The thin potato slices bake into tender layers that hold together when you unmold them. The butter soaks into every layer, adding richness. And that cheese? It melts between the slices and creates these gorgeous, lacy, frilly edges on top that get golden and caramelized in the oven. This is the side dish that steals the show at Thanksgiving, that makes your weeknight dinner feel special, that proves sometimes the simplest things are the most impressive.
Why You’ll Love This Recipe
- Only 4 ingredients—potatoes, butter, salt, cheese
- Individual portions that look restaurant-quality
- Crispy edges with tender centers in every stack
- No boiling or mashing required
- Perfect for holidays—make ahead and reheat
- Kid-friendly assembly—layering is fun
- Impressive presentation with minimal effort
- Great for portion control
- Cheese creates golden, lacy edges on top
- The kind of side dish that becomes the star
Ingredients
Makes 12 stacks
- 4-5 medium russet or Yukon Gold potatoes (about 2 lbs)
- 6 tablespoons unsalted butter, melted
- 1½ teaspoons kosher salt
- 1½ cups shredded sharp cheddar cheese (or Gruyère), divided
Optional for Enhancement:
- Fresh thyme leaves
- Garlic powder
- Black pepper
- Chopped fresh chives for garnish
Equipment
- Standard 12-cup muffin tin
- Mandoline slicer or very sharp knife
- Large mixing bowl
- Pastry brush
- Cutting board
- Measuring cups and spoons
- Butter knife or offset spatula (for removing stacks)
Step-by-Step Instructions
Step 1: Prep Your Potatoes
Preheat your oven to 375°F (190°C). Generously spray a 12-cup muffin tin with non-stick cooking spray, making sure to coat the bottoms and sides of each cup thoroughly—this ensures your stacks release cleanly. Scrub your potatoes clean but don’t peel them (the skin adds texture and holds the stacks together). Using a mandoline slicer set to about ⅛-inch thickness or a very sharp knife, slice the potatoes into thin, uniform rounds. Uniformity is key—it ensures even cooking.
Step 2: Season the Potatoes
Place all the potato slices in a large mixing bowl. Drizzle the melted butter over them and sprinkle with the salt. Using your hands, gently toss everything together until every potato slice is coated with butter and seasoned with salt. This step ensures flavor in every layer.
Step 3: Start Layering
Sprinkle about 1 tablespoon of shredded cheese into the bottom of each muffin cup. This creates a golden, crispy base and helps the stacks release from the tin. Now begin layering the buttered potato slices into each muffin cup, standing them slightly on edge and overlapping them in a circular pattern. Pack them in snugly—they’ll shrink as they cook and you want substantial stacks.
Step 4: Add Cheese Between Layers
After you’ve filled each cup about halfway, sprinkle a small pinch of cheese over the potatoes in each cup. This creates melted cheese pockets throughout the stacks. Continue layering potato slices until each cup is filled to just above the rim—they’ll sink down as they bake.
Step 5: Top with Cheese
Sprinkle the remaining cheese generously over the top of each stack. This creates those gorgeous golden, lacy, crispy cheese edges that make these so irresistible. Don’t be shy with the cheese on top—it’s what creates the beautiful presentation.
Step 6: Bake to Golden Perfection
Place the muffin tin in your preheated oven and bake for 55-65 minutes. You’re looking for the potatoes to be completely tender when pierced with a knife, the edges to be golden brown and crispy, and the cheese on top to be melted and beautifully caramelized with those frilly, lacy edges. If the tops are browning too quickly but the potatoes aren’t tender yet, loosely tent with aluminum foil for the last 15 minutes.
Step 7: Rest and Release
Remove from the oven and let the stacks rest in the muffin tin for 5 minutes. This allows them to set slightly and makes them easier to remove without falling apart. Run a butter knife or small offset spatula around the edges of each stack to loosen them, then gently lift them out. They should release easily thanks to your generous greasing at the beginning.
Step 8: Serve with Pride
Transfer the stacks to a serving platter. Garnish with fresh chopped chives or thyme if desired. Serve warm and watch people’s faces light up when they see these gorgeous individual potato towers.
Pro Tips
- Use a mandoline for uniform slices. Consistent thickness ensures even cooking. If using a knife, go slow and steady.
- Don’t skip the bottom cheese layer. It creates a crispy base and helps with release.
- Pack the cups tightly. The potatoes shrink as they cook, so fill them generously.
- Russet or Yukon Gold both work. Russets are starchier and fluffier; Yukon Golds are creamier and hold together better.
- Make sure every slice is buttered. The tossing step ensures flavor in every layer.
- Let them rest before removing. Those 5 minutes make the difference between intact stacks and potato rubble.
Variations & Substitutions
- Try different cheeses: Gruyère for nutty sophistication, Parmesan for sharp saltiness, or a mix of cheddar and Parmesan.
- Add herbs: Sprinkle fresh thyme leaves or rosemary between the layers.
- Make it garlicky: Add ½ teaspoon of garlic powder to the butter before tossing.
- Add bacon: Crumble cooked bacon between the layers for smoky richness.
- Use sweet potatoes: Thinly sliced sweet potatoes work beautifully and add color.
- Make it spicy: Add a pinch of cayenne pepper to the butter.
- Add onions: Layer in very thin onion slices for extra flavor.
- Make it fancy: Use truffle salt instead of regular salt for special occasions.
Serving, Pairing & Storage
How to Serve:
Serve warm as individual stacks on plates or a serving platter. These are beautiful enough to be the centerpiece of your vegetable spread.
What It Pairs Well With:
Roasted chicken or turkey, grilled steak, baked ham, roasted vegetables, green salad, or as part of a brunch spread with eggs and bacon.
Storage:
Store leftover stacks in an airtight container in the refrigerator for up to 3 days. They’ll soften slightly but are still delicious.
Freezing Instructions:
Not recommended. The texture of the potatoes changes significantly after freezing and thawing.
Reheating Tips:
Reheat in a 350°F oven for 10-15 minutes until warmed through and the edges crisp up again. Or reheat individual stacks in an air fryer at 350°F for 5-7 minutes for maximum crispiness.
Make-Ahead:
Assemble the stacks completely in the muffin tin up to 4 hours ahead, cover with plastic wrap, and refrigerate. Add 5-10 minutes to the baking time since they’re starting cold.
FAQ
Can I use a different type of potato?
Yes! Russets create fluffier stacks, while Yukon Golds are creamier and hold together better. Both work beautifully.
Do I have to peel the potatoes?
No! The skin adds texture and helps hold the stacks together. Just scrub them clean.
My stacks won’t come out of the tin—what went wrong?
You didn’t grease the tin generously enough. Use plenty of non-stick spray, especially on the bottoms.
Can I make these ahead?
Assemble completely up to 4 hours ahead, cover, and refrigerate. Bake when ready, adding 5-10 minutes to the baking time.
The tops are browning too fast—what do I do?
Loosely tent with aluminum foil for the last 15 minutes of baking to prevent over-browning while the potatoes finish cooking.
Can I make these in a mini muffin tin?
Yes! Reduce the baking time to about 35-40 minutes and watch them carefully.
What if I don’t have a mandoline?
Use a very sharp knife and take your time slicing as thinly and uniformly as possible. It’s doable, just requires patience.