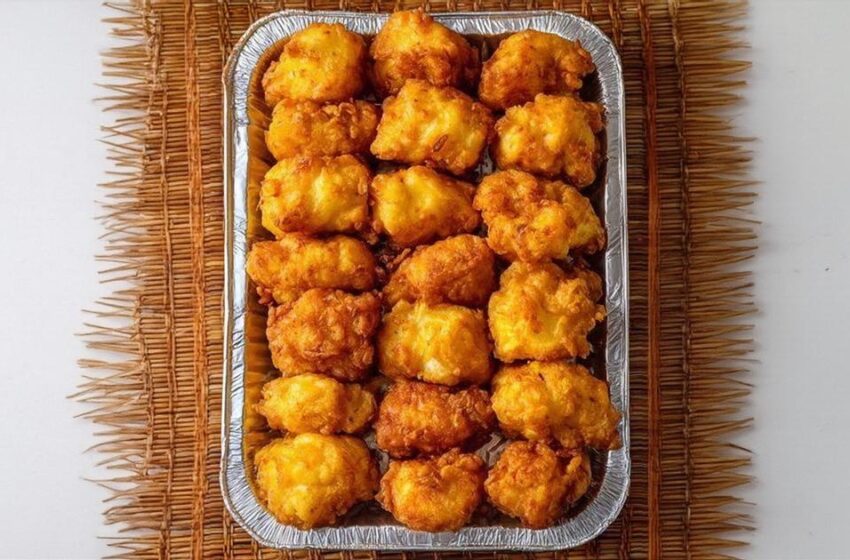
The Crispy, Golden, Irresistibly Juicy Bites That Disappear From Every Platter Before You Can Reach for One
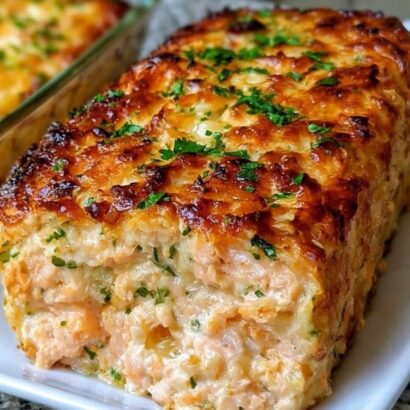
There are certain dishes that need no introduction at a gathering. You set the platter down, turn around to grab a napkin, and by the time you look back half of it is already gone. Southern-Style Fried Chicken Bites are exactly that kind of food — the kind that draws people across the room the moment the aroma hits, the kind that generates genuine competition for the last piece, the kind that someone always asks about before they have even finished chewing. Crispy, golden, and shatteringly crunchy on the outside, tender and impossibly juicy on the inside, seasoned with a warm blend of paprika, garlic, and a whisper of cayenne that builds beautifully with every bite — these are not just an appetizer. They are an event.
The secret behind truly great fried chicken bites is not complicated technique or exotic ingredients. It is patience, buttermilk, and the right combination of spices in the coating. A long soak in cold buttermilk tenderizes the chicken at a deep level while infusing it with a subtle tangy flavor that no other marinade can replicate. A well-seasoned flour dredge creates that thick, craggly, deeply golden crust that stays crispy long after the chicken comes out of the oil. And the right frying temperature — consistent, hot, and carefully maintained — ensures that each bite cooks through completely while the exterior reaches that perfect shade of burnished gold.
 Why These Chicken Bites Will Be the First Thing Gone at Every Gathering
 That Crust Though: The combination of buttermilk marinade and a heavily seasoned flour dredge creates a coating with the kind of audible, shattering crunch that makes everyone at the table stop talking for a moment on the first bite.
 Perfectly Balanced Seasoning: Paprika for warmth and color, garlic and onion powder for savory depth, and just enough cayenne to add a gentle, building heat that keeps things interesting without overwhelming anyone.
 Made for Feeding Crowds: This recipe scales up effortlessly. Double or triple the quantities and you have enough for a full party platter — and you will need every single piece.
 Easily Made Gluten-Free: One simple swap to a quality gluten-free flour blend and every guest at the table can enjoy these without a moment of hesitation.
 Endlessly Versatile: Serve them as an appetizer with dipping sauces, as the star of a full Southern dinner plate, tucked into slider buns, or piled into a basket for game day. They belong everywhere.
 What You Will Need
Servings: 4–6
- 1.5 lbs boneless, skinless chicken breasts, cut into bite-sized pieces — cut them as uniformly as possible, aiming for roughly one-inch pieces, so that every single bite cooks at the same rate and no pieces are over or undercooked.
- 2 cups buttermilk — the non-negotiable foundation of this recipe. The lactic acid in buttermilk gently breaks down the protein fibers in the chicken, resulting in a tenderness that is noticeably superior to chicken that has not been marinated. It also helps the flour coating adhere far more effectively and creates microscopic bubbles in the crust that make it dramatically crispier.
- 2 cups all-purpose flour — the base of the coating that creates that thick, craggly, deeply satisfying crust.
- 1 tablespoon paprika — provides the warm, brick-red color and a gentle sweetness that defines the visual and flavor profile of classic Southern fried chicken.
- 1 teaspoon garlic powder — deep, savory, and essential.
- 1 teaspoon onion powder — works alongside the garlic powder to create a rounded, full-bodied savory base in the coating.
- 1 teaspoon salt — seasons the crust from the outside in.
- ½ teaspoon black pepper — adds a clean, sharp heat.
- ½ teaspoon cayenne pepper — provides that signature gentle kick that builds beautifully with each bite. Increase for more heat, reduce for a milder result.
- Vegetable oil for frying — use enough to fill your skillet or Dutch oven to approximately 2 inches deep.
 Step-by-Step Method
Marinating time: 1 hour minimum, overnight preferred | Prep time: 15 minutes | Fry time: 5–7 minutes per batch | Servings: 4–6
Step 1 — Marinate the Chicken: Place all the cut chicken pieces into a large bowl and pour the buttermilk over them, making sure every piece is fully submerged. Cover tightly with plastic wrap and refrigerate for at least 1 hour — though overnight marinating produces dramatically superior results, with noticeably more tender and flavorful chicken throughout. Do not skip or shorten this step; the marinating time is doing critical work that no amount of seasoning can compensate for.
Step 2 — Prepare the Seasoned Flour: In a wide, shallow bowl or rimmed plate, combine the all-purpose flour, paprika, garlic powder, onion powder, salt, black pepper, and cayenne pepper. Whisk everything together thoroughly until the spices are completely and evenly distributed throughout the flour. Taste a pinch — the flour mixture should taste noticeably seasoned and slightly spicy on its own, because much of that flavor will be what you taste in the finished crust.
Step 3 — Heat the Oil: Pour vegetable oil into a heavy-bottomed skillet or Dutch oven to a depth of approximately 2 inches. Heat over medium-high heat until the oil reaches a steady 350°F (175°C). Use a kitchen thermometer for accuracy — this temperature is critical. Oil that is too cool will give you greasy, pale, soggy chicken as the coating absorbs oil before crisping. Oil that is too hot will brown the exterior before the interior is cooked through. A consistent 350°F is the sweet spot that produces a perfectly crispy golden crust and fully cooked, juicy interior simultaneously. Pro Tip: Drop a small pinch of the flour mixture into the oil to test the temperature if you do not have a thermometer — it should sizzle immediately and vigorously on contact.
Step 4 — Dredge the Chicken: Remove the marinated chicken pieces from the buttermilk one at a time, allowing the excess buttermilk to drip off for a few seconds — but do not shake them completely dry. A thin coating of buttermilk remaining on the surface is what helps the flour adhere and creates those wonderful, irregular, craggly bits in the crust. Press each piece firmly into the seasoned flour mixture, turning it and pressing again to ensure a thorough, even coating on all sides. Set the coated pieces aside on a plate while you coat the remaining chicken.
Step 5 — Fry in Batches: Carefully lower the coated chicken pieces into the hot oil in small batches — never crowd the pan. Overcrowding drops the oil temperature dramatically, which means the chicken steams rather than fries, resulting in a soft, pale, greasy coating instead of a crispy golden one. Fry each batch for 5 to 7 minutes, turning the pieces occasionally with tongs or a slotted spoon to ensure even browning on all sides, until they are deeply golden brown all over and cooked through completely with no pink remaining in the center.
Step 6 — Drain and Rest: Remove each finished batch with a slotted spoon and transfer to a wire rack set over a baking sheet — this is significantly better than a paper towel-lined plate, as the rack allows air to circulate underneath the chicken and keeps the bottom of the crust crispy rather than steaming it soft. Allow to drain and rest for 2 to 3 minutes before serving. Serve immediately while the crust is at its shatteringly crispy best.
Serving Suggestions
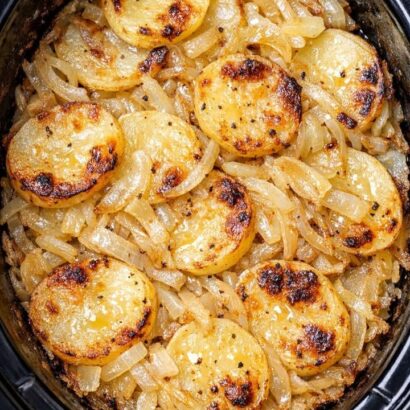
Pile these chicken bites high in a basket lined with parchment for a beautiful, rustic presentation. Serve alongside creamy mashed potatoes, buttery corn on the cob, or a sharp and tangy creamy coleslaw for a full Southern dinner spread. For dipping, offer honey, hot sauce, ranch dressing, or a simple honey mustard — all of them pair magnificently with the warm spiced coating. For the full down-home experience, add a side of honey-glazed cornbread and a tall, ice-cold glass of sweet tea or fresh lemonade.
Expert Tips and Variations
 Spice It Up: Add an extra ¼ teaspoon of cayenne to the flour, or stir a tablespoon of your favorite hot sauce directly into the buttermilk marinade for a deeper, more integrated heat throughout the chicken.
 Add Herbs to the Coating: A teaspoon of dried thyme or dried oregano mixed into the flour adds a wonderful aromatic quality that elevates the flavor profile noticeably.
- Make It Gluten-Free: Substitute the all-purpose flour with a good quality gluten-free flour blend — the results are remarkably similar and equally delicious.
 Try Panko for Extra Crunch: Replace half the flour with panko breadcrumbs for an extraordinarily crunchy, textured crust with even more satisfying bite than the traditional all-flour coating.
 Keep Finished Batches Warm: Place finished batches on the wire rack in a 200°F oven while you fry the remaining chicken — they will stay hot and crispy without overcooking.
 Frequently Asked Questions
Can I use chicken thighs instead of chicken breasts? Absolutely, and many people actually prefer thighs for their richer flavor and higher fat content, which makes them even more forgiving during frying and results in an even juicier finished bite.
Can I make these in an air fryer? Yes — spray the coated pieces generously with cooking spray and air fry at 400°F for 12 to 15 minutes, flipping halfway through. The crust will not be quite as deeply golden as the oil-fried version, but the results are still excellent.
How do I store and reheat leftovers? Store cooled leftovers in an airtight container in the refrigerator for up to 3 days. Reheat in a 400°F oven for 8 to 10 minutes on a wire rack to restore the crispiness — avoid the microwave, which will make the coating soft and limp.
Set this platter down at your next gathering. Turn around. See how long it lasts.