You know those nights. You’re staring into the pantry, dreaming of something decadently creamy and comforting, but the voice in your head is listing the realities: too many pots, too much cleanup, too little energy. What if I told you that the ultimate cozy, cheesy, garlicky pasta bake could come together in one single dish—no pre-boiling, no draining, no fuss? It sounds like magic, but trust me, it’s just smart, delicious cooking.
This Oven-Baked Garlic Butter Parmesan Pasta Bake is my weeknight hero. It’s the dish that feels like a hug, smells like your favorite Italian restaurant, and magically creates its own luxuriously creamy sauce right in the pan as it bakes. Gather your family around the table, because this is about to become your new go-to.
Your Simple Lineup for a Spectacular Dinner
The beauty here is in the simplicity. You likely have most of this on hand.
The Pasta & Broth Base:
12 ounces (about 3/4 of a standard box) of short pasta like penne, rigatoni, or fusilli
4 cups (32 oz) low-sodium chicken broth or vegetable broth
1 cup whole milk or half-and-half (for maximum creaminess)
1 teaspoon fine sea salt
The Flavor Foundation (a.k.a. The Good Stuff):
4 tablespoons unsalted butter, cut into pats
8-10 garlic cloves, minced (yes, really! It mellows as it bakes)
1 teaspoon Italian seasoning
½ teaspoon freshly ground black pepper
¼ teaspoon red pepper flakes (optional, for a subtle kick)
The Cheesy, Golden Topping:
1 ½ cups freshly grated Parmesan cheese, divided
1 ½ cups shredded mozzarella cheese
½ cup shredded fontina or provolone cheese (for extra meltiness)
Fresh parsley or basil, chopped, for garnish
Quick Substitution Notes:
Dairy-Free? Use a rich, unflavored plant-based milk (like oat or cashew) and vegan butter. For the cheese, a store-bought vegan mozzarella/Parmesan blend can work in a pinch.
Out of Fresh Garlic? 1 ½ teaspoons of high-quality garlic powder can stand in.
Broth: This is your main flavor driver, so use a good one! Water will leave it bland.
Let’s Make the Magic Happen: Step-by-Step
I promise, this is as easy as it gets. Preheat your oven to 425°F (220°C). Grab your deepest 9×13 inch baking dish—no need to grease it.
H3: Step 1: Build Your Flavor Base Right in the Pan
Scatter the uncooked pasta evenly in the dry baking dish.
Evenly pour the chicken broth and milk over the pasta. Sprinkle with the salt. Don’t stir just yet.
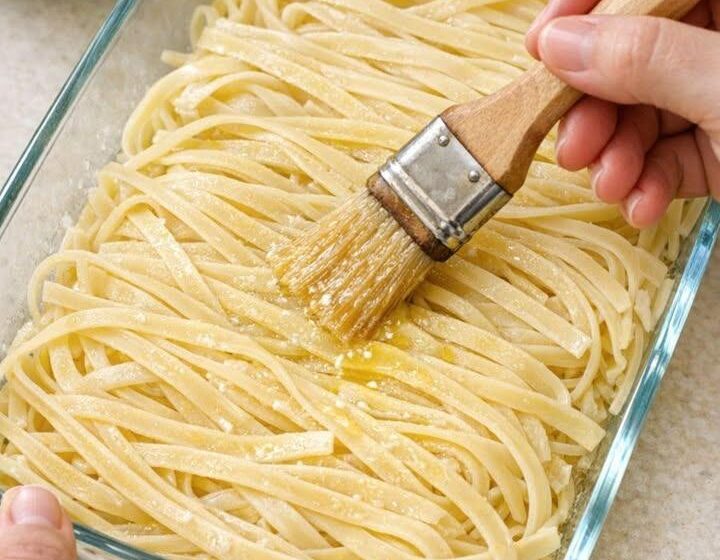
Now, dot the top with all those pats of butter. Sprinkle the minced garlic, Italian seasoning, black pepper, and red pepper flakes (if using) over everything.
H3: Step 2: The First Bake (Where the Sauce Forms!)
Cover the dish very tightly with aluminum foil. This is crucial—it creates a steamy environment that cooks the pasta and melds the flavors.
Bake for 25 minutes.
H3: Step 3: The Cheesy Transformation
Carefully remove the dish from the oven (steam will be hot!). Uncover and give everything a really good stir. You’ll see the pasta is almost al dente and a lovely, thin sauce has formed.
Stir in 1 cup of the grated Parmesan cheese until it melts into the sauce.
Evenly sprinkle the remaining ½ cup Parmesan, all of the mozzarella, and the fontina over the top.
H3: Step 4: The Golden-Brown Finish
Return the dish to the oven, uncovered, for 12-15 minutes, until the cheese is completely melted, bubbly, and has gorgeous golden spots.
Let it rest for 5-10 minutes after baking. This is non-negotiable! It allows the sauce to thicken up perfectly.
Garnish with fresh herbs and serve right from the dish.
H2: Pro Tips for the Absolute Best Pasta Bake
Grate Your Own Cheese: The pre-bagged stuff contains anti-caking agents that can make your sauce grainy. Taking 2 minutes to grate a block of Parmesan and mozzarella is the #1 secret to a silky, smooth melt.
Pasta Shape Matters: Stick with short, sturdy shapes that can stand up to the one-pan method. Delicate pastas like angel hair or thin spaghetti won’t work as well here.
The Broth is Key: Since this dish isn’t boiled in salted water, the broth provides all that foundational flavor. A good-quality, low-sodium broth lets you control the salt level perfectly.
Resting is Part of the Recipe: I know it’s tempting to dive right in, but letting it sit is what transforms the liquid into a creamy, clingy sauce.
H2: Make It Your Own: Delicious Variations
This recipe is a perfect canvas!
Protein Power: Stir in 2 cups of shredded rotisserie chicken, cooked Italian sausage, or diced ham along with the first round of Parmesan.
Veggie Loaded: Add 2 cups of fresh spinach, chopped sun-dried tomatoes, or small broccoli florets to the baking dish before the first bake.
Sun-Dried Tomato & Basil: Add ½ cup chopped oil-packed sun-dried tomatoes with the garlic, and top with fresh basil after baking.
Truffle Indulgence: Drizzle the finished dish with a tiny bit of white truffle oil for a restaurant-worthy twist.
H2: Your Pasta Bake Questions, Answered
H3: Can I prepare this ahead of time?
You can assemble it up to the point of the first bake. Combine the pasta, broth, milk, and seasonings in the dish, dot with butter, and cover tightly. Refrigerate for up to 24 hours. Let it sit at room temp for 30 minutes before baking, as the cold dish will need a few extra minutes in the oven.
H3: Why is my pasta still hard?
Ovens and baking dishes vary. If the pasta isn’t al dente after the first bake, simply add a ¼ cup of warm broth or water, re-cover, and bake for another 5-10 minutes before adding the cheese.
H3: Can I use gluten-free pasta?
Yes! Opt for a sturdy, high-quality GF pasta like those made from brown rice or quinoa blends. You may need to reduce the first covered bake time by 3-5 minutes, as some GF pastas can become mushy if over-baked.
H3: How are the leftovers?
Honestly, some of us think they’re even better! The flavors deepen overnight. Reheat individual portions in the microwave with a splash of broth to loosen the sauce, or cover the whole dish with foil and warm in a 350°F oven until heated through.
There you have it—the dinner that delivers maximum comfort with minimal effort. It’s the proof that sometimes, the most satisfying meals come from trusting a simple process and letting the oven do the work.
I truly hope this recipe brings as much joy to your table as it does to mine. Now, go forth and conquer that weeknight dinner slump. You’ve got this.